Listing an event on BreamBay.nz is free and takes a couple of minutes. Here’s the Add an Event form, section by section.
The screenshots show the desktop layout. On a phone the form is a single column, but the fields and the order are the same.
Rather not fill in the form yourself?
Send us the details on the contact page
and we’ll add the event for you.
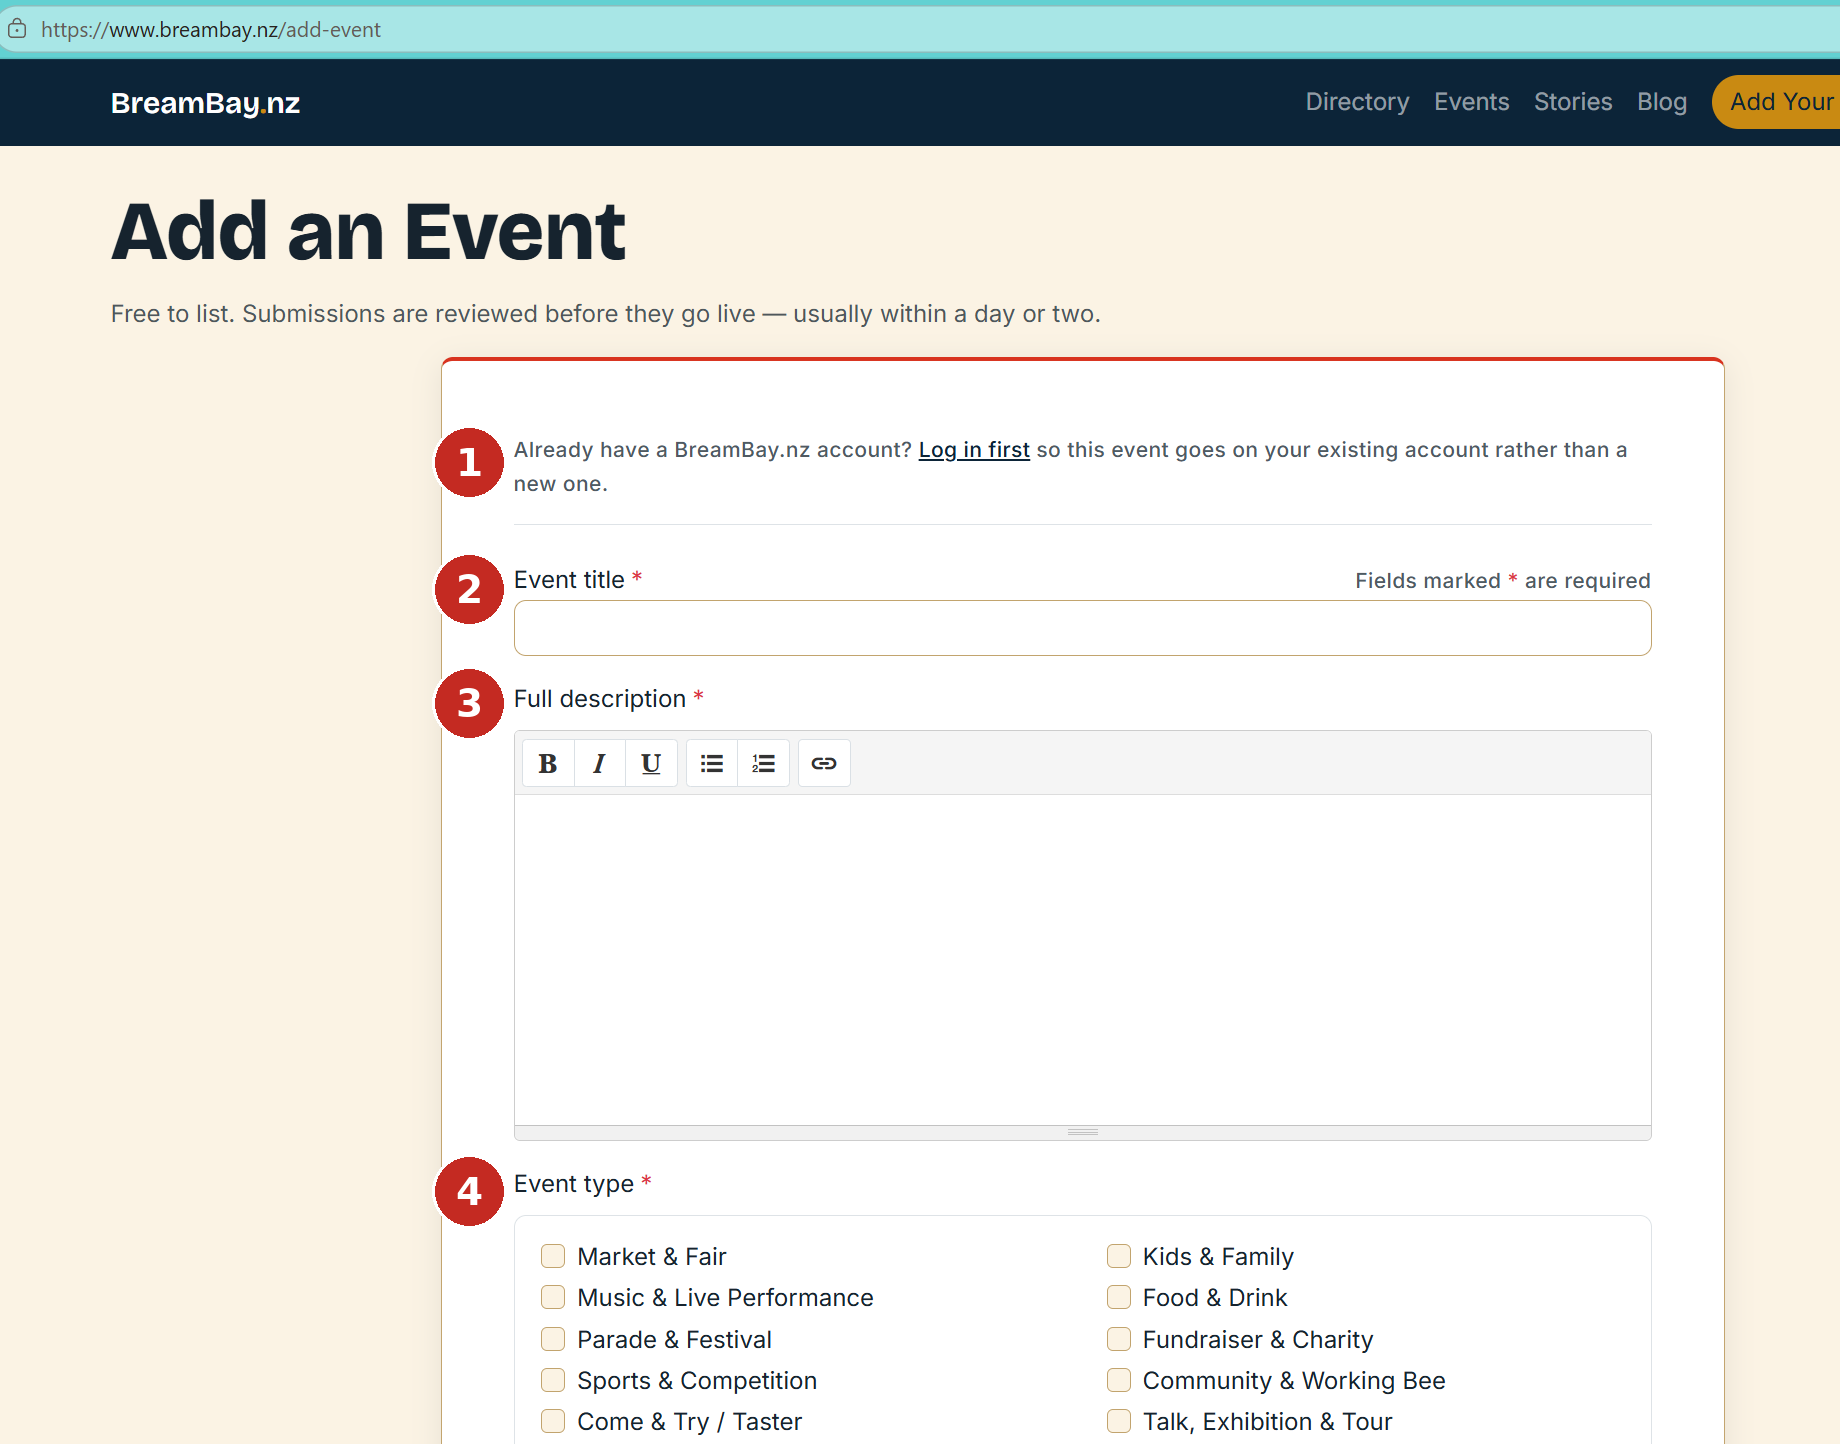
- Already have a BreamBay.nz account? — Use the “Log in first” link at the top of the form so this event lands on your existing account instead of creating a new one.
- Event title — Keep it short and specific — this is what shows on the calendar.
- Full description — The details: what’s on, who it’s for, and anything people should know before turning up.
- Event type — Tick every category that fits. You can choose more than one, but you need at least one.
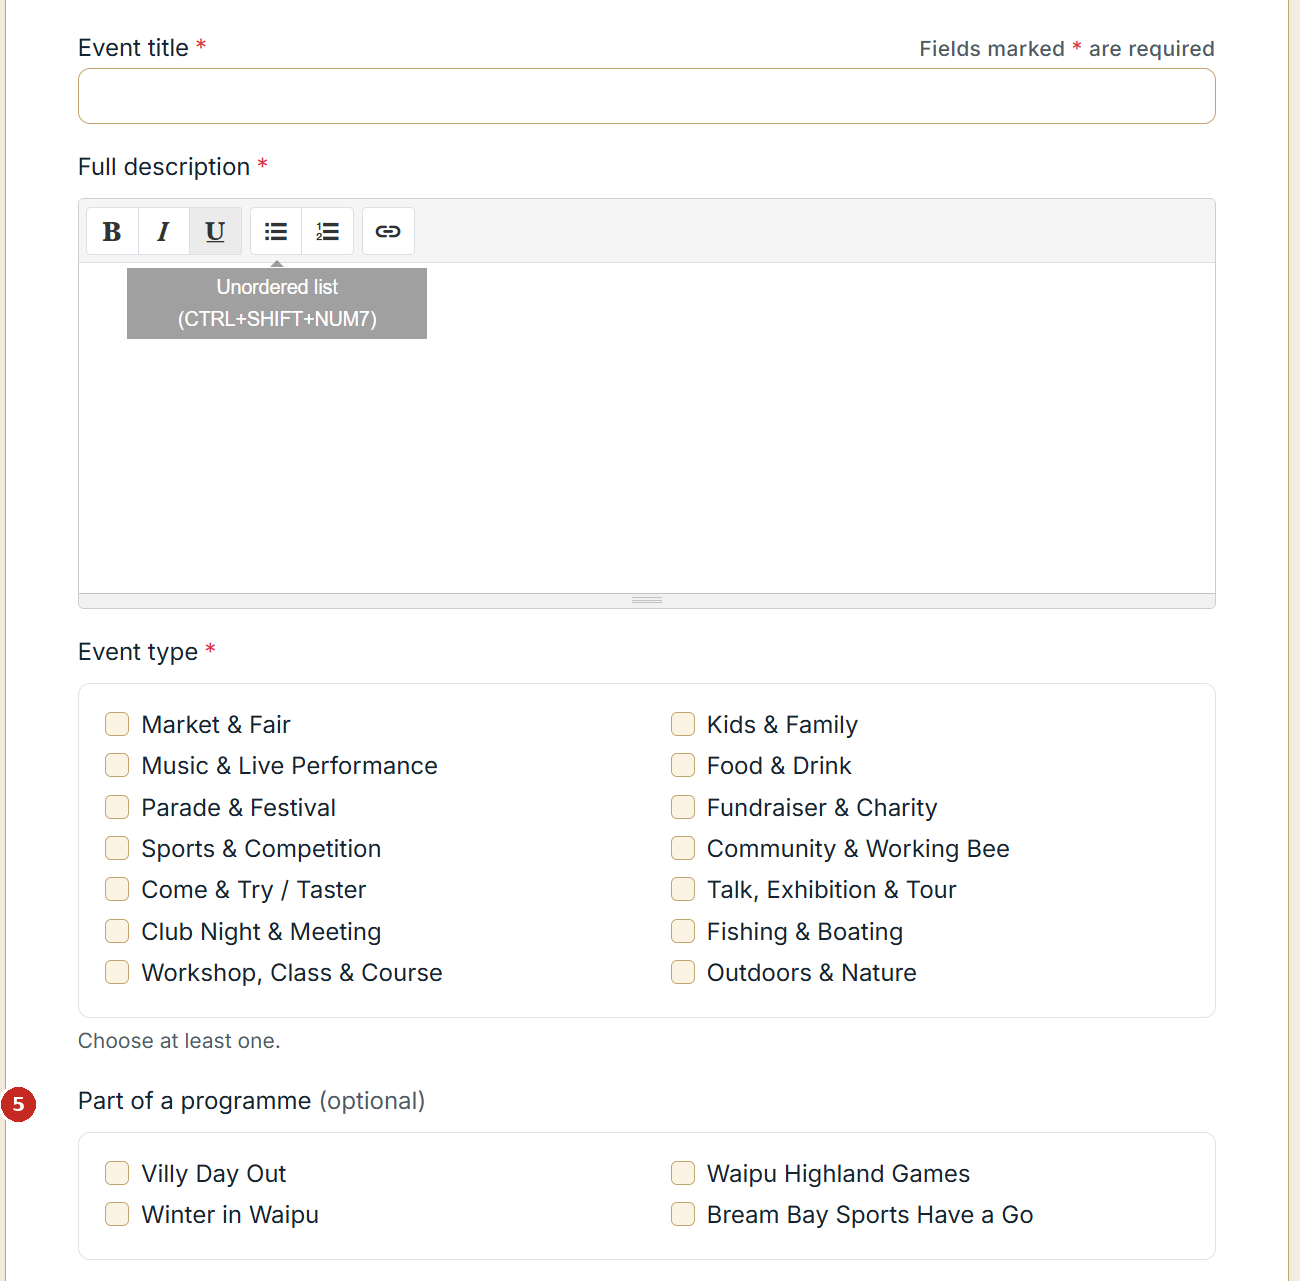
- Part of a programme (optional) — If the event belongs to a wider programme — such as Winter in Waipu or the Waipu Highland Games — tick it here. Leave it blank if none apply.
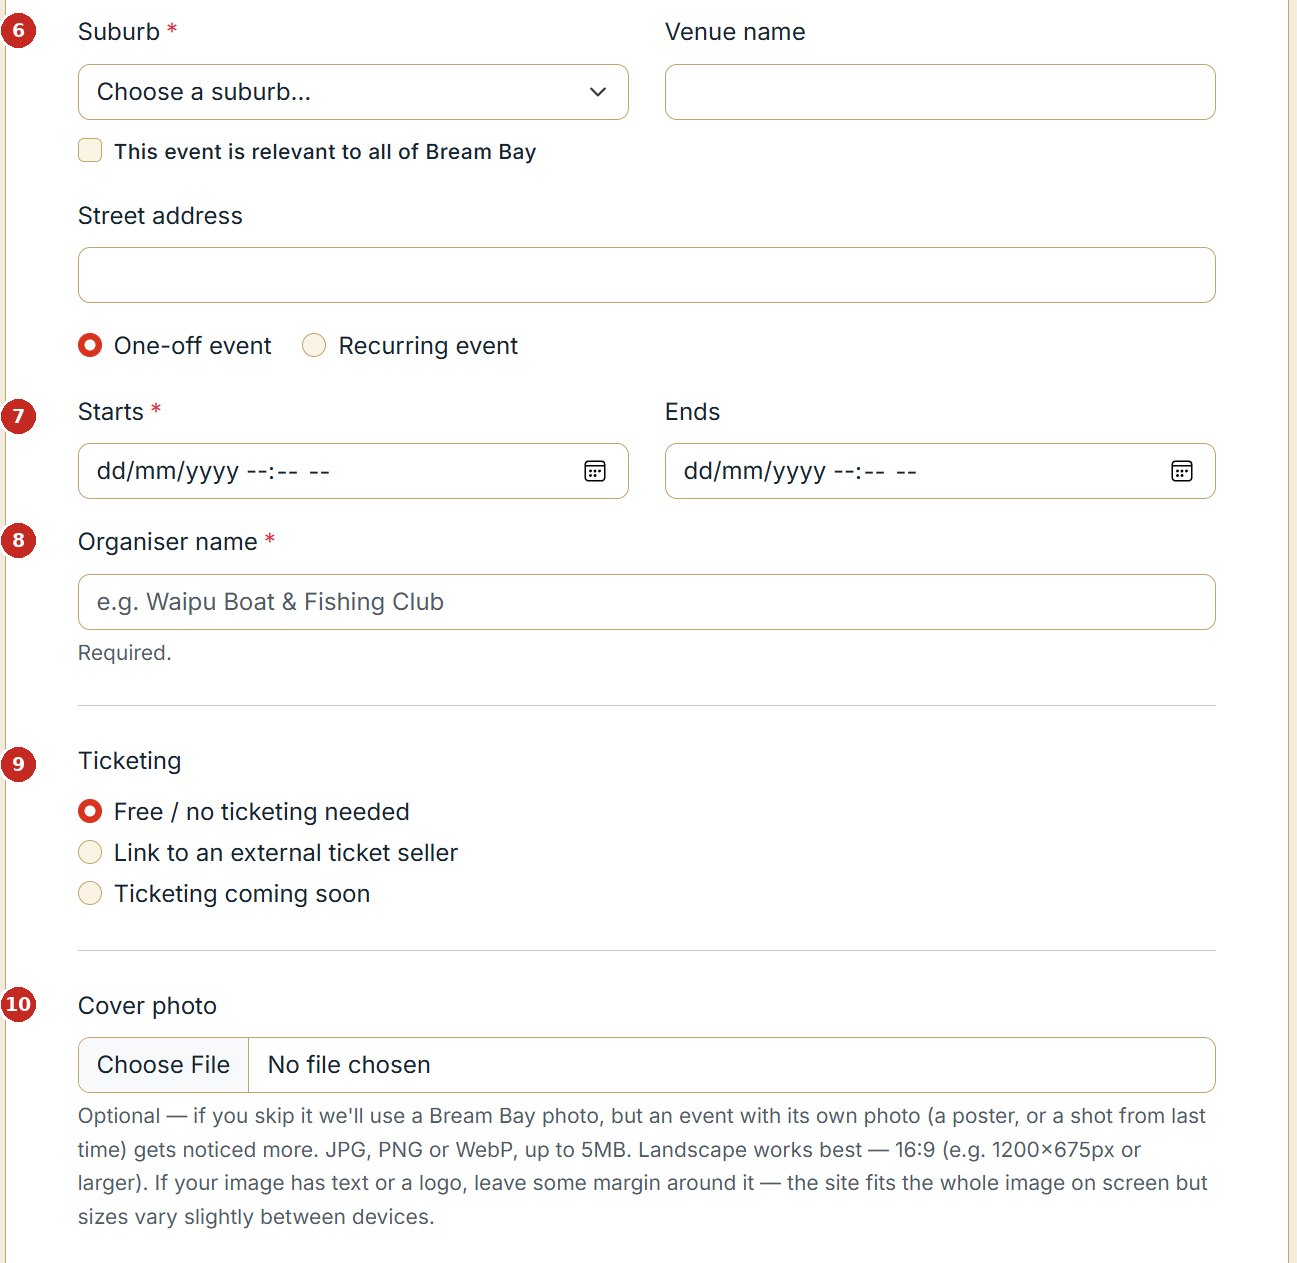
- Suburb and venue — Pick the suburb and add the venue name. Tick “this event is relevant to all of Bream Bay” instead if it’s bay-wide.
- Starts and ends — Choose one-off or recurring first, then set your dates and times.
- Organiser name — Who’s running it — a club, a business, or your own name.
- Ticketing — Free, a link to buy tickets elsewhere, or “ticketing coming soon” if it’s not sorted yet.
- Cover photo (optional) — Skip it and we’ll use a Bream Bay photo, but an event with its own photo — a poster, or a shot from last time — gets noticed more. Landscape works best.
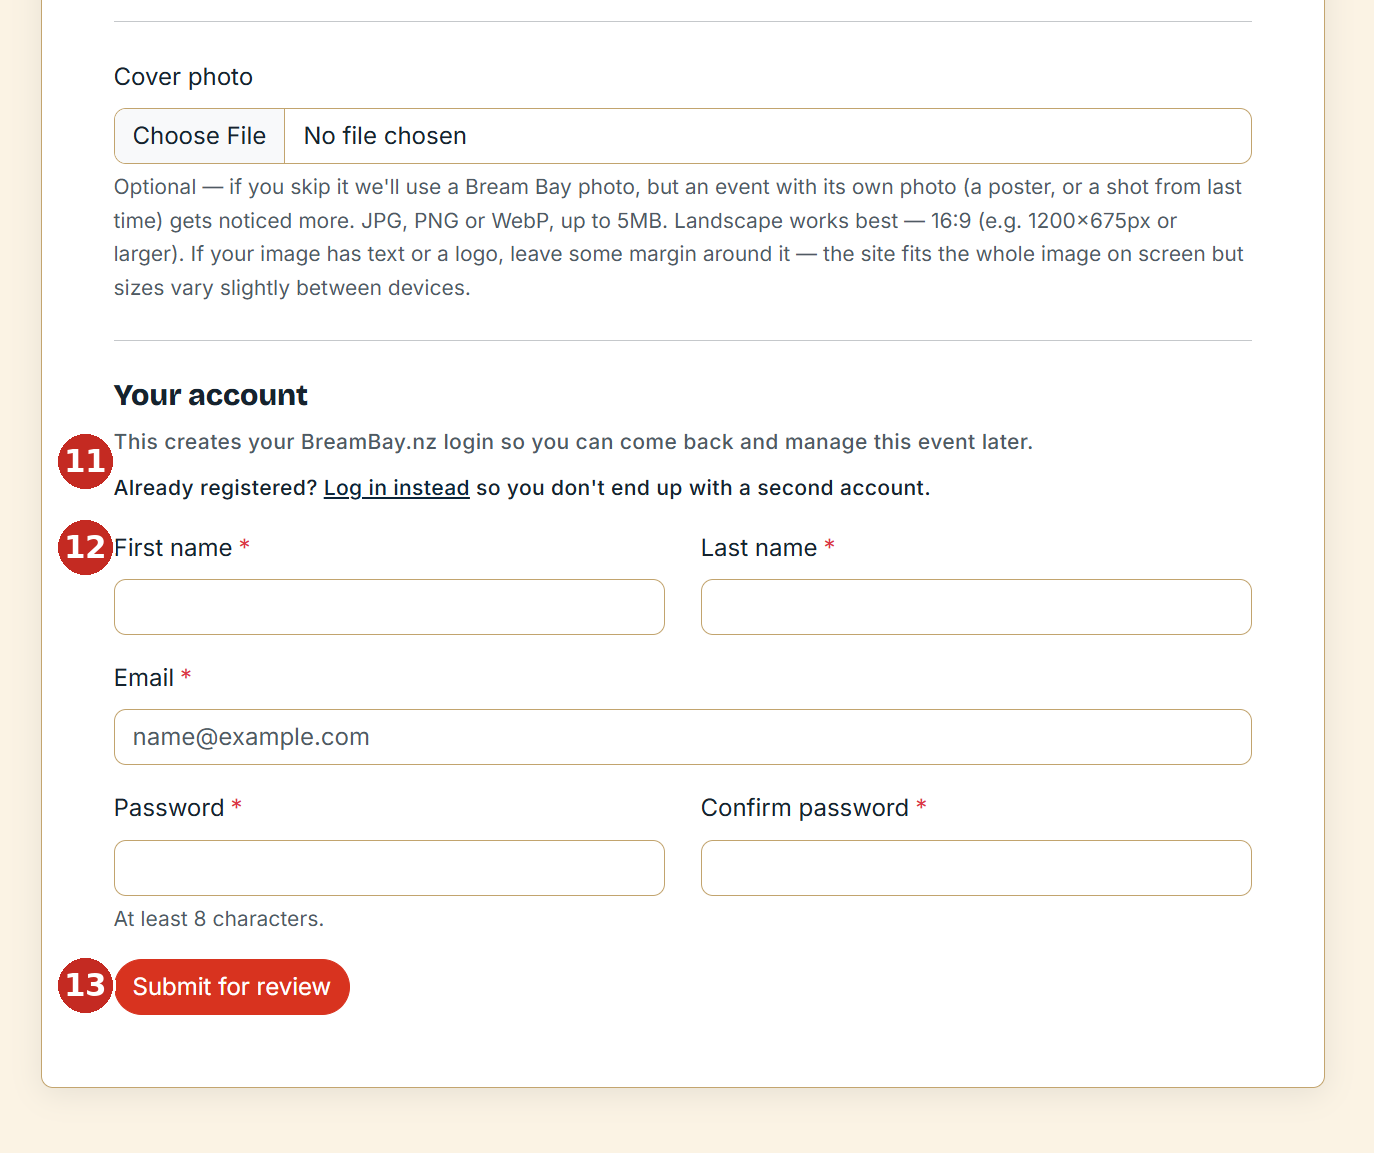
- Already registered? — There’s a second “Log in instead” link right above the account fields, so you don’t end up creating a second account by accident.
- Your account — First time listing? Fill in your name, email and a password (at least 8 characters). This is your login for managing the event later.
- Submit for review — We check submissions before they go live — usually within a day or two.